Monday, December 27, 2010

Quadcopter KK Board


KK Quadcopter basically is a helicopter controlled by 4 motors. It require 3 axis gyro's to control each motor to perform maneuver. It requires no servo to operate.

My setup for KK quad "+" config is the following:

1. Aluminum frame with plywood center piece. Each arm 290mm length.
2. DVD casing
3. 450 Landing skid
4. 4 x 18-20A ESC -- 72g
5. 4 x FC 28-22 Brushless Outrunner 1200kv -- 156g
6. KK Board
7. 10x4 CCW & CW props

I'm targeting AUW would be arround 800g.
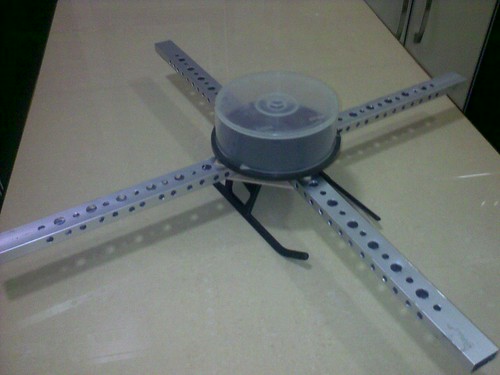


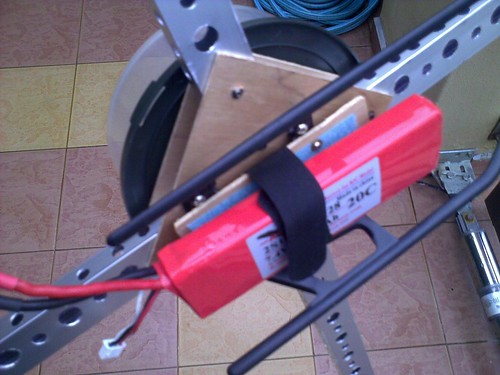
Battery try underneath the center part
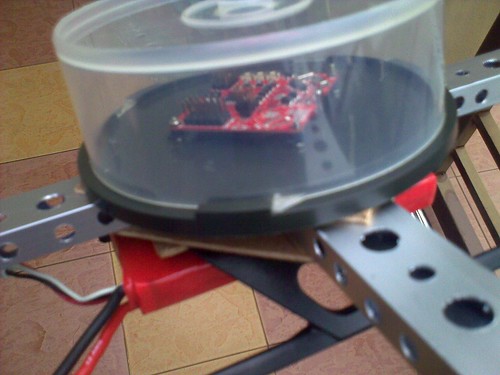
KK board safely inside CD case
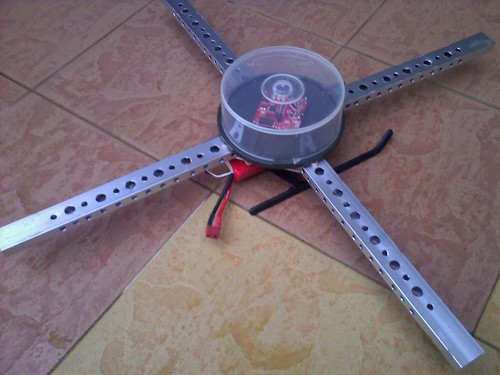

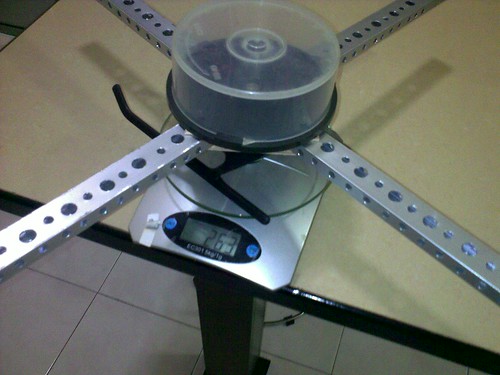
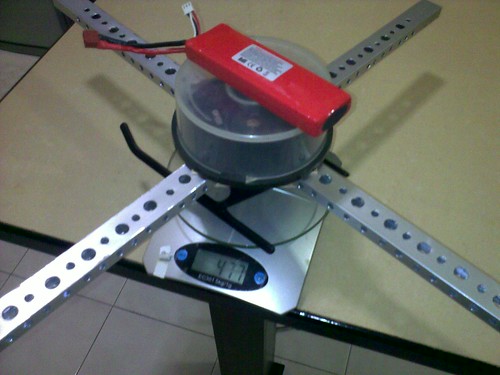
Current weight 497g..
I can spend another 300 gram on rx(30g), wiring(30g) , motor's (est 170g) and ESC's (est 80g).

Update:
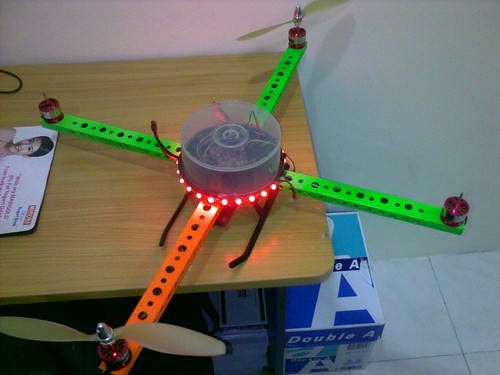

DONE!!! AUW 865g..

just to share my setup..

--> Initial setup for mode 1 radio..
1. Set the radio to plane mode
2. On radio and wait for ESC arming tone..if tone enter programming mode reverse throttle channel (3 on futaba)
3. Wait for ESC arming tone done..and move rudder stick to right and wait for KK board LED turn blue..if not then lower throttle trim while rudder stick move to right. Trim throttle until LED turn blue (mine require 4 clicks).
4. set radio atv aileron, elevator to 50%..set all pots trim to 50% (far clockwise = 0, moving anti = 100).
5. Check gyro direction by throttle up 1/4 stick (without props). Move the quad forward..forward motor should speed up..if not reverse gyro.
6. Reverse gyro by set the roll pot trim to 0, on radio and board move rudder stick to right and LED on KK board should blink..to change gyro direction move the elevator stick to counter the direction.
7. Do the same for aileron direction.
8. CCW goes to the forward and backward motor and CW props goes to left and right motors.
9. Make sure your gyro mounted on a level surface.
10. Overhead test to ensure all operation is working. Quad should resist any changes by speeding up motors.
11. Every-time powering up quad..turn rudder stick to the right to initialize flight.

More information regarding multirotor machine can be found:

http://www.kkmulticopter.kr/
http://www.kkmulticopter.com/
https://www.aeroquadstore.com/

Maiden flight..really nice..stable flight and easy to control..I like the feeling of flying a quad..

Link


Night flying..

Sunday, December 19, 2010

F-15 EPO 70mm Hobbycity


This is my latest addition to my fleets. The third EDF jet after Su-27 and Red Arrow. I had pretty bad experience with due to lack of understanding in EDF setup. This time my knowledge on EDF has grown and finally understand the setup on motor, DF unit, wattage, and their relation.

Back to F-15, First thing I like about this particular product is the EPO foam. The surface is so nice and much sturdy that EPS. I believe all EDF jet should be using EPO foam. The detail is remarkable. However my unit come with missing nose cone. Bummer. If you're ordering from OHS better ask them to check all the parts intact. Or else have to wait forever for it and having to confront their help desk with no chance of getting the missing item. Well need to find solution for this. Build your self. I'm using a special type of foam "dunno what it's called" but its' easy to cut and shape. Malay's call it "foam bunga kawin". It' green in color and quite brittle. Luckily I bought myself several sheet of FG cloth and WBPU to glass the cone. The result if satisfactory although not quite professional. Hey this is my first time.

Well the build is quite easy and straight forward. I'm using hot glue to attach all the parts. The only changes I made to jet is the ESC. I change it to 40A esc since I'm using 4S lipo 1750mah. I need to add 60gram of dead-weight on the tail since it's quite nose heavy. On full throttle I've got 37.5A with 620Watt of power. Should be getting more or close to 1:1 thrust. Lipo barely warm. Oh ya one thing to mention you need to balance the fan and check for the motor and fan installation (threadlock!!!). I remove the nose cone attach to the EDF fan for better balancing.

Well waiting for maiden..batu pahat or ladang tebu...

24 Dec 2010
Maiden day


a success...but this sucker needs 4S lipo instead of 3S..need more upgrade to provide more thrust needed...


I'm dreaming of airliner Airbus A380..huhu 4 EDF setup...

Friday, December 3, 2010

F-14 Tomcat EDF

It has been quite a while since my last post..recovering from surgery and some minor health related problem. Although not yet fully recover..the spirit of RC still strong.

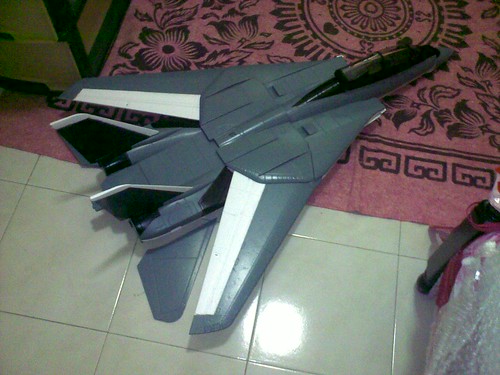
Just received a bargain from mudah. Bought this F-14 Tomcat EDF. My third EDF to date and this one sure one hell of assembly. With swept wing mechanism and a lot of part to mod to make it airworthy. Thinking of glassing this body to make it a little stronger.

Let the spirit of topgun run in your vein..but this is going to be a very looooooong project..I'm not going to hurry on this..

alas my F-15 is also coming..


A few notable links that talk about F-14 assembly and modification

http://www.hobbycity.com/hobbyking/forum/forum_posts.asp?TID=8597&PN=1&SID=fedf6z8f9bb44fzb38c2cbfz9a8bc22d

http://www.rcgroups.com/forums/showthread.php?t=1068584

http://www.rcgroups.com/forums/showthread.php?t=1151024

I'm thinking to put the following setup

Motor: Turnigy 2615 EDF Outrunner 4800kv for 55/64mm it has 690g of thrust x 2 = 1380g which is 1:1 power to weight ratio (assuming AUW 1.35kg)

ESC: Hobbyking SS Series 50-60A ESC Should be more than enough


Wednesday, June 2, 2010

New motor for Piaget


My Techone motor finally give up. What happen is after 1 minute of flying the motor loose it's torque. Unable to hang and fly properly although it still rotating. Decided to change to a new motor. I quickly pickup my spare motor but not techone motor but a 2205C 1400Kv from Hobbycity. I'm using 9x4.7 GWS slowflyer prop.

2205C 1400Kv Brushless motor
Weight: 28g
Shaft: 3mm


Spec.
GWS9050 @3S
Max Amp: 9.5A
Max Power: 121.5W
Thrust: 497g
APC8x8.3 @2S
Max Amp: 6.5A
max Power: 58W
Thrust: 349g

Thursday, May 13, 2010

Piaget V2


Almost finish with my second Piaget. This time with full installation; spoiler, landing skid, fuse alignment, clean carbon support, correct horn and hinge on installation. Only left with motor mount which last time I mistakenly gave it to a friend.

Thursday, May 6, 2010

Flash EPP Build


Completed!!!


All the electronics placement


This is my Flash EPP build from rc-factory.


Start with the black fuse with flat carbon fiber for reinforcement. Then attach the both wings on a flat surface with CA and accelerator. Cut across the wing with sharp knife and slot in CF rod. I cut another 2 more CF slot on top of the wing.


Two more CF spar for more reinforcement.


Cut CF slot for elevator. Fix the elevator to the fuse on a flat surface.


Attach the landing skid, upper and lower fuse.


I'm using motofly 1080kv BL motor and the mount require for the inside firewall. I opt not to use the toothpick style since the outside mount is quite fragile.


Another CF rod reinforcement for more stable flight.


Waiting for electronics installation.


Maiden video.


Monday, March 29, 2010

HK401B GYRO on Atom 500


Very good tail control and hold in very strong wind. Tested this gyro on Atom. Couldn't see much different from GY401. So why pay more for the same holding power. :-).

PC-9 EP build

Project completed.


I cannot take it to see my PC-9 left cold so I start building her. It takes good 2 hours to install servo and landing gear.


Completed with the first part of assembly (landing gear and servos)


Aileron control. Only left with covering the servo's wire

Nose landing gear

elevator and rudder


servo bay

Tomorrow night with motor and ESC....stay tuned..

Maiden flight

.

Sunday, March 28, 2010

UH1 Mini Titan

UH1 Mini Titan from Thunder Tiger. Nice detail and comes with all you need to fix your mini titan with this fuse.


Saturday, March 27, 2010

PC9 EP


I always admire PC7 but the most important thing is I want EP not GP. But the closest I can get is PC9. So I today I went to yapan and I saw this PC9 hanging in his shop. This is just a sneak peak preview of PC9 EP made in Thailand.